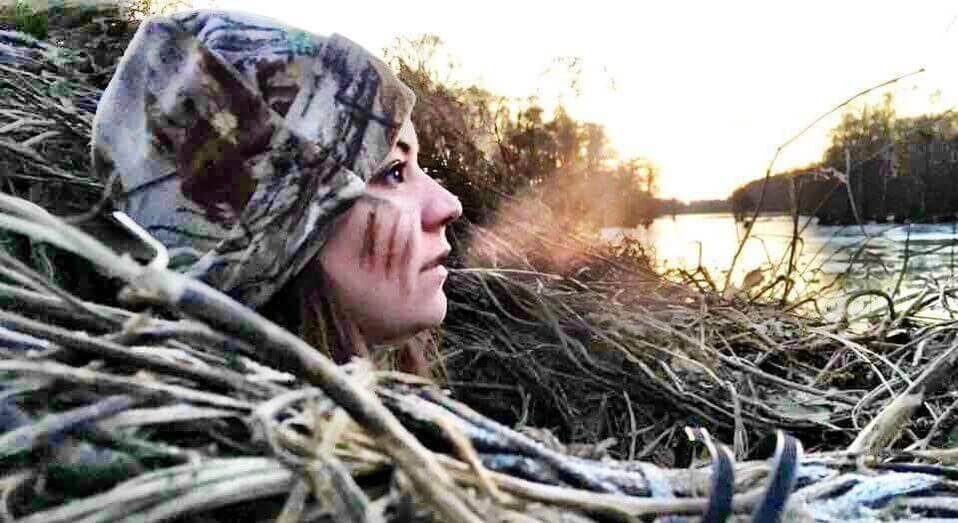
  I am a mother of four daughters, a wife, a full time employee, a member of the NWTF and a huntress; however, I wasn't always these things. I was born and raised in West Palm Beach, Florida. I grew up with warm weather and sandy beaches beneath my feet. Hunting was not in the picture. About 6 years ago I moved to Georgia with my husband and children and said goodbye to the sandy beaches and hello to my new lifestyle. The more I share, the more I find my story is like many others. When I met my husband, I was not a hunter. In fact, I couldn't understand his obsession when deer season rolled around. I understood that it was more than a passion of his, it was in his blood as he had been hunting since the age of three. I also understood that he would spend as much time in the woods as possible and would rarely be home. I just didn't have a full grasp on why and what this addiction was. As our second year together rolled around I became more interested. I wanted to learn more about hunting and tag along with him. Unfortunately, the camp he was hunting at had this insane rule that women couldn't stay the night although I am not sure how that would've affected hunting. Maybe the other men just needed an excuse to go alone. Needless to say, we didn't go there often that year. After that year my decision was made, I was going to become a hunter. Our weekends now consist of making the drive to Johnson County in South Georgia. My husband, our daughters and I stay at a family oriented camp where we hunt, fish, bbq, and spend time on the Oconee River. What was once foreign and confusing has become a way of life that I wouldn't trade for anything this in this world. Trust me when I say that it has been fun getting to this point and it's just getting started! Those of you who didn't grow up hunting, and maybe some who did, I am sure can relate. You decided you were interested and wanted to get involved; however, you only had your husbands camo and hand me downs to get you started. For those of you who are just now getting started, here are a few tips for you. Get your feet wet. Don't worry about all the fancy gear your first year. Give it a try with what you have, even if that means wearing your husband's clothes. There is no sense in investing a ton of money until you know if you like it or not. Once you have made the decision to be a hunter you're ready to do some shopping. That's part of the fun, right? Side note; don't be surprised when the store associate immediately asks your husband if he needs assistance. When I walked into the store to grab my items for the first time it went a little like this: I found the firearm I wanted and for whatever reason the associate seemed to be trying to talk me out of it as if I walked in on a whim and had not done any research in advance. I know one thing, as a mother of four girls I am organized and do my research. Ok back to it, here are some items you will likely need:
Be prepared for the whole family to get involved. My three oldest daughters now share this passion for hunting. Although this causes stares at times and some of their friends do not understand, they are beginning to show their love for outdoors and hunting. Most importantly, enjoy your journey! It's taken me three years, but this year I met some like-minded women and mothers who share my love and passion for the outdoors. I have also joined Prois Outdoor & Field Apparel for Women as part of their hunt staff. I say this not to brag, but to show you the endless possibilities your journey can bring. That's just it... This is a journey! Move over men!!! #HuntressMom #HuntingMom DeAnna Hightower, Nature’s Paint Pro Staff 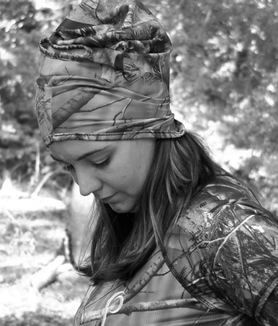
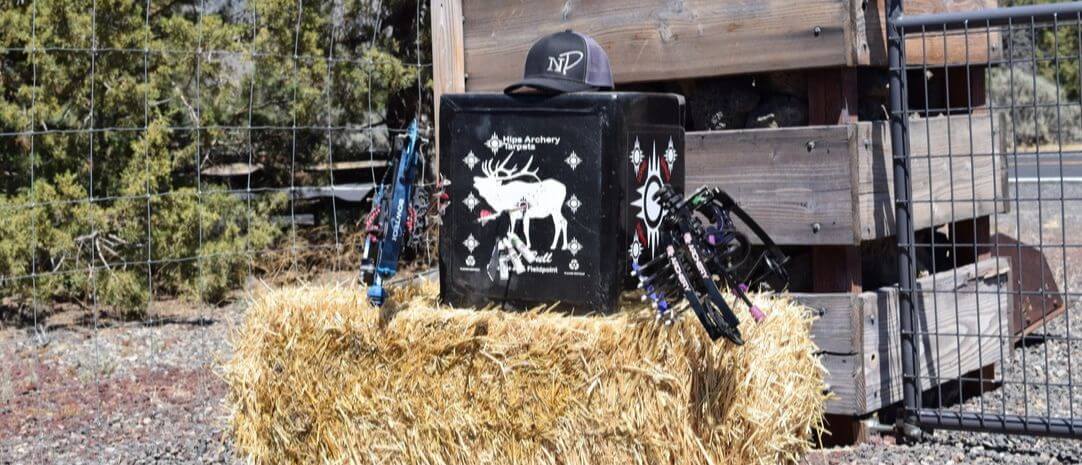
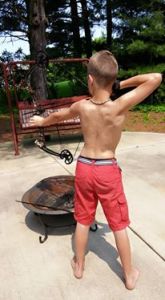
1 Comment
  My father had me on his shoulders and in the woods with him as soon as I could muddle the word “hunting.” I couldn’t thank him enough for teaching me about the woods, the importance of respect and safety, and all the nuances about shooting a bow. I have met so many people throughout my life that have the interest, but were not taught as a child about the sport. Or perhaps, they have reached out for guidance and were intimated by the overwhelming information and expense of taking on archery. This experience can be akin to a scrawny guy like me walking into a gym full of meat-heads bellowing testosterone fueled grunts. Yes, I would walk out and just accept my scrawniness. When venturing into the world of archery and bowhunting, the first question might be, “what kind of bow do I get?” The market is flooded with some amazing technology now-a-days. Most every bow on the rack can produce arrow speeds approaching 300+ fps. Some speed bows on the market today blaze into the realm of 360 fps. The prices range from about $300 to well over $1,000. Which one do I choose? Keep in mind, I’ve killed deer with bows at both ends of the spectrum. No matter the price range, your accuracy of your shot depends heavily on the amount of practice you put in. Establish your budget and begin shooting. It’s all about repetition and making consistent shots while building your muscle memory. There a a few parts of the bow which can make a difference in your choice. The cam(s) on the bow are the energy producing powerhouse of the bow. The cam size and shape determine the “feel” of the draw cycle, the let-off at full draw, and the amount of kinetic energy released on the arrow. The larger and “more radical” the shape of the cam, the more speed can be produced, and a fast arrow makes a happy archer. These more radical cam toting speed bows come with a higher price tag. But have no fear, there are plenty of options in bow manufacturers. There are many brands that are very cost effective choices that still pack one heck of a punch. Another term you may hear being discussed is the brace height. The brace height is the distance between the grip of the bow and the string. The longer this distance, the more “forgiving” the bow is for a beginner. Today’s speed bows have a much shorter brace height, but are also a little more difficult to shoot. Much like driving a sports car as opposed to a sedan. Now that you’ve selected the bow that fits your budget, remember there are essential accessories you still need to purchase. You’ll need to equip your new bow with a sight, an arrow rest, and of course you’ll need some arrows. Though you can shoot your bow with only these accessories, I recommend not doing so without a release and a peep sight installed. A release will provide more stability in arrow flight as there is minimal lateral deviation of the string at the launch. Imagine releasing the string with your fingers. The string will tend to “roll” off your fingertips causing a lateral oscillation of the arrow as it comes off the bow. To minimize this, a release starts the forward string movement from a center position resulting in a centered arrow departure. Now for the peep sight. A peep sight forces you to look through the string at the same point every time you shoot. With the peep as the rear point of view and the sight pin as the front, your line of sight will be far more consistent than without a peep. The object is to have your line of sight as straight as an arrow every time…excuse the pun. A qualified bow technician at your local archery shop should adjust your draw length and install all of these accessories on your bow tailored to you. There are other accessories like a stabilizer, wrist strap and silencers. Just focus on shooting your bow and getting the feel, these extras can come later. I often hear people ask, “how many pounds do you shoot?” This is not a competition about who can muscle more weight. You should draw a weight that is comfortable for you. When I say comfortable, I mean many times over. My son’s first bow season will be this fall. I told him he is not allowed to hunt this season unless he shoots at least 25 arrows/day. I set his bow to 35 pounds and after 20 arrows it becomes pretty challenging. There are very particular muscles in your chest, shoulder and back that you never knew you had until you begin shooting a lot. These muscles will strengthen over time and you’ll find wanting to pull a little more weight to obtain some more arrow speed. Let this happen and stay committed to your shooting schedule. I have not found any exercise or workout program that will help. Shoot, just shoot. While shooting, there are some simple things you’ll need to focus on to increase accuracy. There is a tendency to give your bow a death grip. This can cause something known as “torque.” That simply means that your bow hand is unintentional “twisting” the bow left or right. Loosen up the grip. You should be able to wiggle your fingers at full draw. Anchor point is the term for the point your hand falls on the side of you face when at full draw. I tend to rest the the back of my hand on the same point on my jaw line every time. If you shoot a lot, this becomes muscle memory and will exponentially increase your shot consistency. Your stance is also important to keep consistent. Feet should be shoulder width apart and perpendicular to the target. I mark the ground where I want my son to place his feet. It's all about doing it the same way every time. Archery and bowhunting are my passions. Nothing makes me happier than to help someone get started in the sport that I love so much. Don’t be intimidated…just commit. Justin Johnson, Nature’s Paint Pro Staff 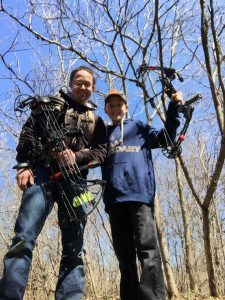  Take a stroll in the woods during any big game hunting season and you will notice a great divide among hunters. They will all be wearing camo clothes, however, some will be using camo face paint and others won't. If you ask those who skip the hunting face paint their reasoning, most of them will respond “it's really not needed”; however, if you spend a little more time with them and dig a little deeper the true reasons are revealed. A majority of the responses boil down to three silly reasons hunters are skipping the camo face paint. Selfies Lets face it, we are a selfie generation. Social media has transformed our world. It's common to check Facebook, Instagram and other social networks for the latest news and events in our friends lives. Many of the updates found in your feed will involve some sort of selfie. Go ahead, have a look. The hunter selfie ranges from a simple picture that shows someone out in the woods enjoying themselves to an intense game face that indicates they are on the pursuit. Needless to say, no matter what the angle is, hunters want to capture the perfect selfie for their friends to enjoy. Many hunters are skipping out on hunting face paint because they want the perfect selfie that contains the perfect face free of smudges and dirt. They simply want to look as perfect as possible and are therefore leaving the camo face paint at home. With the right hunting face paint hunters can create the perfect face paint pattern that will not only help capture the perfect selfie but is 100% functional as well. First and foremost, camo face paint is designed to keep you concealed and help you disappear with nature. With the right hunting face paint, hunters can also capture that perfect selfie. Skin Irritation Its no secret that a majority of the hunting face paints on the market today causes some sort of skin irritation or breakout. We have heard it time and time again, “I don't use hunting face paint because it makes me break out”, “I don't use hunting face paint because it irritates my skin”. The reason for this is simple, a majority of the hunting face paints on the market are filled with harmful chemicals. These harmful chemicals are not designed to be on your skin and often cause itching, burning and breakouts. Its no secret hunters have to be on their “A” game when on the pursuit. How can they possibly be on their “A” game when trying to overcome these types of irritations? When hunters switch to an all natural camo face paint they will notice those skin irritations simply don't exist and they can focus on their hunt, and only their hunt. Difficult Many camo face paints are both difficult to apply and remove. A majority of hunting face paints come in a standard camo compact with three colors. To apply a hunter must vigorously rub their finger on a color until they have enough to wipe on their face. This is both time consuming and messy. To make matters worse, the typical camo face paint is even more difficult to remove, especially when at hunting camp. The best option is to take a soapy wash cloth and start scrubbing, even then, there are typically remnants of green, black and brown left in hunter’s pores. Hunters can save time and hassle selecting a tubed paint, one that applies directly to the face.This will cut down on application time by allowing hunters to apply directly to their face instead of from the compact, to their finger, to their face. Sticking with an all natural camo face paint will eliminate the time and difficulty associated with removing the paint. An all natural camo face paint like Nature’s Paint can be removed in seconds with a towelette, face wipe or baby wipe. Watch how Nature’s Paint debunks the three common reasons hunters are skipping the paint. 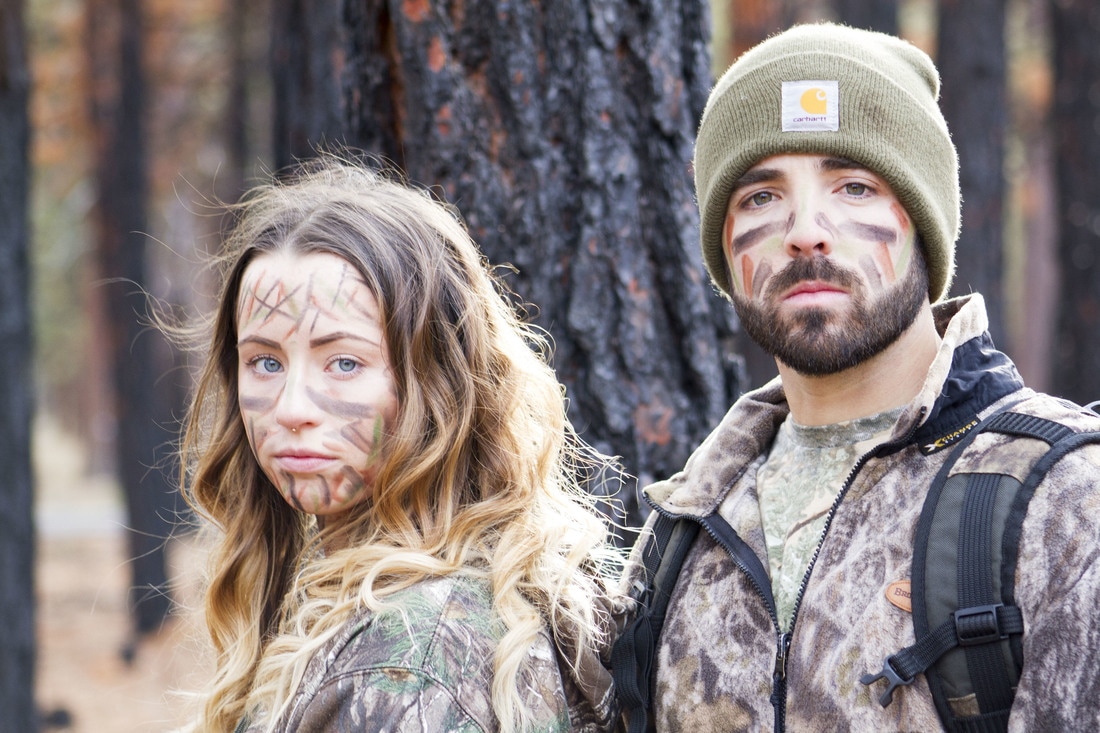 It’s no secret that camo face paint is not only more comfortable, but more effective than a hunting face mask. However, this is only true if you purchase the right face paint for you. There has been some chatter among hunters questioning the need and effectiveness of face paint. I supposed I would ask those hunters why they wear camo. If concealment on your face, neck and ears isn't important why would it be important anywhere else? The answer is simple, it is important. At the end of the day it is up to you whether you use it or not. Camo face paint can help you hide no matter what you are hunting. Whether it be waterfowl, big game, or turkey finding the right paint for you is important. So exactly what should you be looking for in the perfect face paint? Safety and Ingredients The sad truth is many of products on the market today are filled with harmful chemicals, chemicals that are known to cause disease, cancer and health complications. Not to mention, many of these harmful chemicals are the culprits of skin irritation, breakouts and redness. As hunters we spend a great deal of time and resources harvesting our food, food that we know is wild, safe and organic. Why wouldn't we make the same considerations when selecting our camo face paint? Our skin is the biggest organ of the body, absorbing everything we put on it. When selecting the perfect paint for you it's important to be sure you are purchasing a natural camo face paint that is free of synthetic and harmful chemicals. Ease of Use There is nothing worse than purchasing a face paint that is difficult: to locate in your pack, to apply or to remove. First off, you will want to make sure the paint packaging is easy to find when digging around in your pack. I suggest selecting a paint that has some sort of lanyard or string on it. This will make it easy to loop your finger and pull it out of the clutter in your pack. Next, look for paint that is easy to apply. Many standard camo compacts require vigorously rubbing your finger on a color in order to apply the paint to your face. You can save time and hassle selecting a tubed paint, one you can simply remove the top from and apply directly to your face. Most importantly, you will want a paint that is easy to remove. Needless to say, no one wants to spend their time scrubbing paint off of their face. Look for one that can removed with a towelette, face wipe or baby wipe. Resistance Last, but not least, you will want a paint that is able to resist the elements. In a single day you can go from hunting in 70 degree beautiful weather to pouring rain. Your paint will need to be sweat and water resistant. It will need to stay intact while hunting but easy to remove at the end of the day. All in all, you are looking for an all natural face paint that is hassle free, easy on, easy off and sweat and water resistant. These ideal face paint characteristics make for a perfect camo face paint no matter what you are hunting. 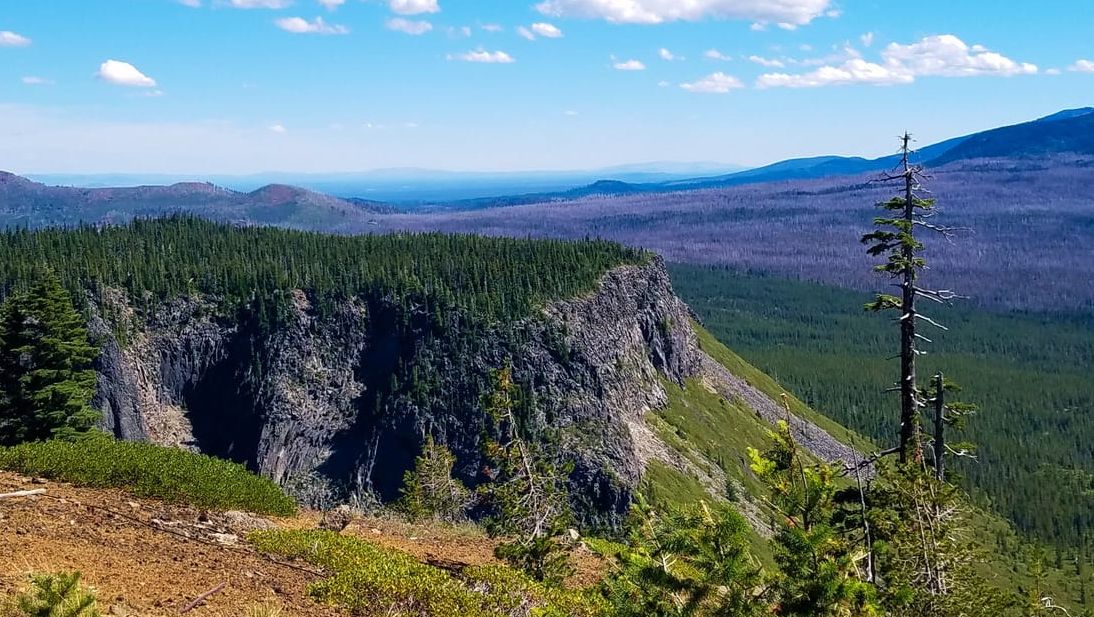 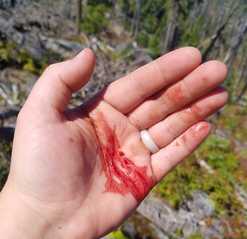 It was opening morning of archery elk season in Oregon and I was off in search of the great wapiti. I had my camo on, my badlands pack on and my bow in hand. The only thing I needed to do was to find an elk. I was off on a short solo hike in new area. To my back was camp and in front of me was a deep canyon. As I headed into the canyon I took in the beauty, scenery and fresh elk sign. Just at that moment I heard branches breaking and spotted a herd of 20+ elk heading up the ridge to my left. These elk were on the move and spooked by something in the canyon. I took a minute to gather myself and began up the ridge in hopes to find where the elk had gone. I sent my husband a text letting him know I encountered elk and was headed up the ridge after them. He decided to get up to the top of the ridge to see if he could spot them. As I hiked up in the dry August heat each branch I stepped on cracked and broke. The hike up wasn't pleasant at all as the terrain of Central Oregon is much different than that of the coast. There were many large boulders, bluffs and steep terrain to navigate. Step after step, the higher I got. Then it happened... I stepped on a piece of wood about 8 inches in diameter, I heard a crack and down I went. Once I gathered myself and got back to my feet I noticed a cut on the palm of my left hand. Blood was flowing like a river. There I was, alone, on a rocky ridge, miles from camp in the August heat. At first panic set in, next fear, then anxiety. Being a nurse I knew right away that I needed to calm myself down and apply pressure to the cut to slow the bleeding. The cut was about an inch wide and pretty deep. From what I could tell it needed stitches or to be glued closed. That simply wasn’t going to be possible given my situation and location. I got in touch with my husband and let him know I had cut my hand and we worked a plan to meet up and head back to camp. I was able to cleanse my cut with some sterile normal saline, apply nonstick sterile gauze and wrap my hand with coban to keep pressure applied and my wound clean. The crazy thing about this whole situation was the morning before I left camp I went through my pack and removed items I knew or thought I wouldn’t need. During this process I removed my first aid kit from my pack and debated putting it back in. The area I was hiking looked to be easy and I didn’t think I was going to end up very far from camp since I was hiking solo. Since this incident I can’t express the importance of always having a first aid kit in your pack on any hike. You never know when you or someone else may need it. In 2015 when I attended my first NW Ladies Hunting Camp Kristy Titus mentioned that she always wears gloves when hunting to protect her hands. I did take this advice into consideration at the time; I now own 4 different pairs. I have learned so much from this situation. Here are my tips for you:
I have personally come to like the Orion Safety Product Survival/First-Aid Kits. Orion offers a variety of different first aid kits for different situations and needs. Most these kits are relatively small in size and are light weight. Aside from having a kit it is important that you know how to use it in case of an emergency. Basic medical knowledge is very important and could save your life or someone else’s. There are many of books available. My favorites are:
I hope you find this helpful or are able to take something from reading this! Stacey Sutherlin, Nature’s Paint Pro Staff 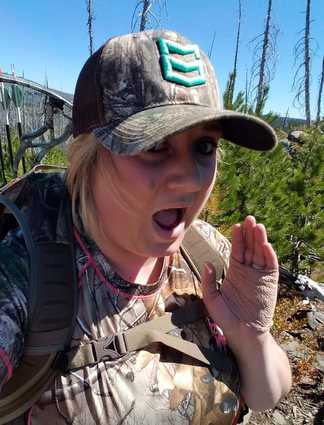 |
 RSS Feed